Using nothing but your computer, some software, and a $20 radio dongle you can receive transmissions from NOAA weather satellites in the sky overhead. This is an incredibly exciting project that’s easy to do but produces great images. Think about it — you can receive images from a satellite almost 1000KM straight above you!
The Theory
NOAA operates a series of weather satellites, designated NOAA 15, NOAA 18, and NOAA 19, that circle the Earth in polar orbits. These satellites are particularly interesting because they’re constantly transmitting an easy-to-decode image signal of what they’re currently looking at. The satellites’ orbits are configured such that one of the three passes within almost every point on the globe every three hours.
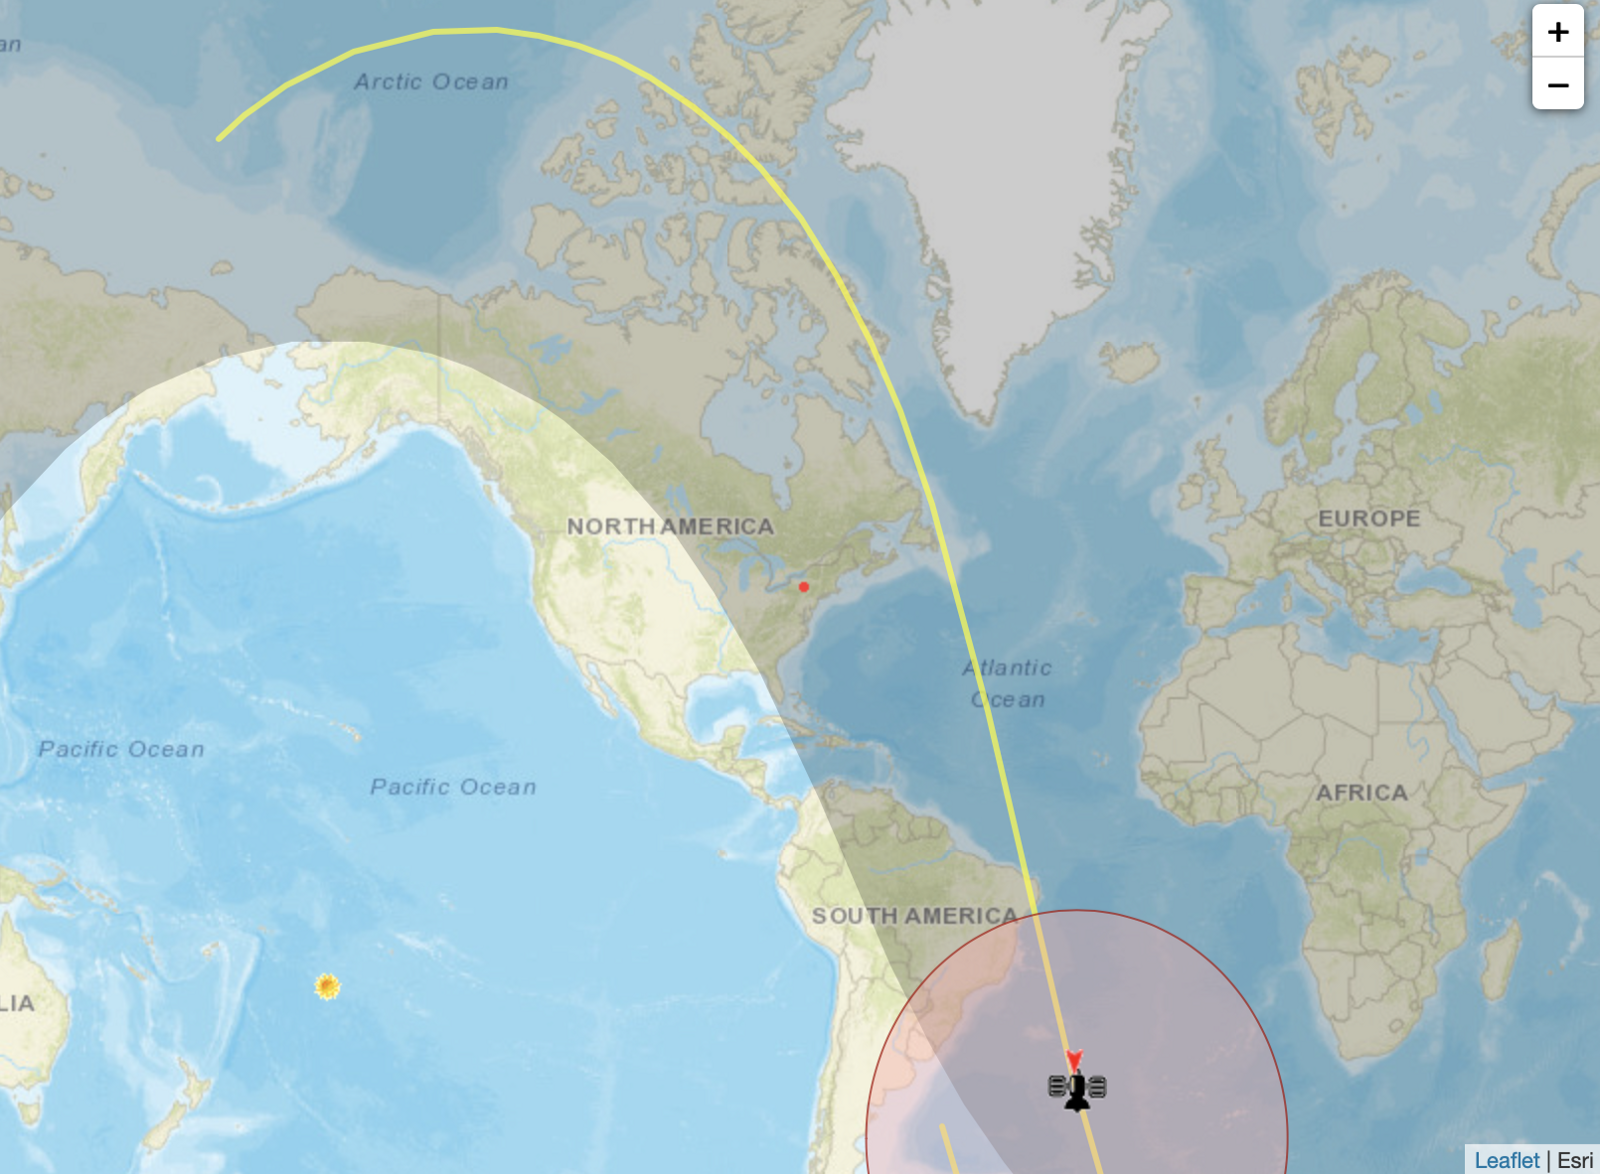
You can track each of the three here. The closer the yellow line is to your location when the satellite is overhead the higher the satellite will appear in the sky. Keep in mind that the satellites’ trajectories across the globe (the yellow lines) are constantly progressing sideways by a few hundred miles with each successive orbit. You don’t really need to worry about tracking them — I’ll soon introduce a program that calculates the flyovers for you.
The images are transmitted line by line via a protocol called APT (Automatic Picture Transmission). It sounds like this:

These satellites transmit images at 137 MHz, which is relatively close to both FM radio transmissions (~90 MHz to 110 MHz) and 2-meter amateur radio transmissions (~144 MHz). The data itself is encoded using frequency modulation (FM), the same method that FM stations use to transmit audio. Much of the encoded information is in the range of human hearing, which is why you can actually convert the signals to audio and “hear” them!

To view the entire US spectrum allocation you can check out this incredibly detailed PDF.
The Hardware
The main things needed for listening to any radio signal are a reciever and an antenna. This awesome kit contains both! You can listen to anything from 500 kHz to 1.7 GHz with this hardware, covering interesting bands such as AM/FM radio, police radio frequencies, amateur radio frequencies, and so much more. Additionally, the included antenna setup is perfect for receiving data from weather satellites. Best of all, it’s under $30!
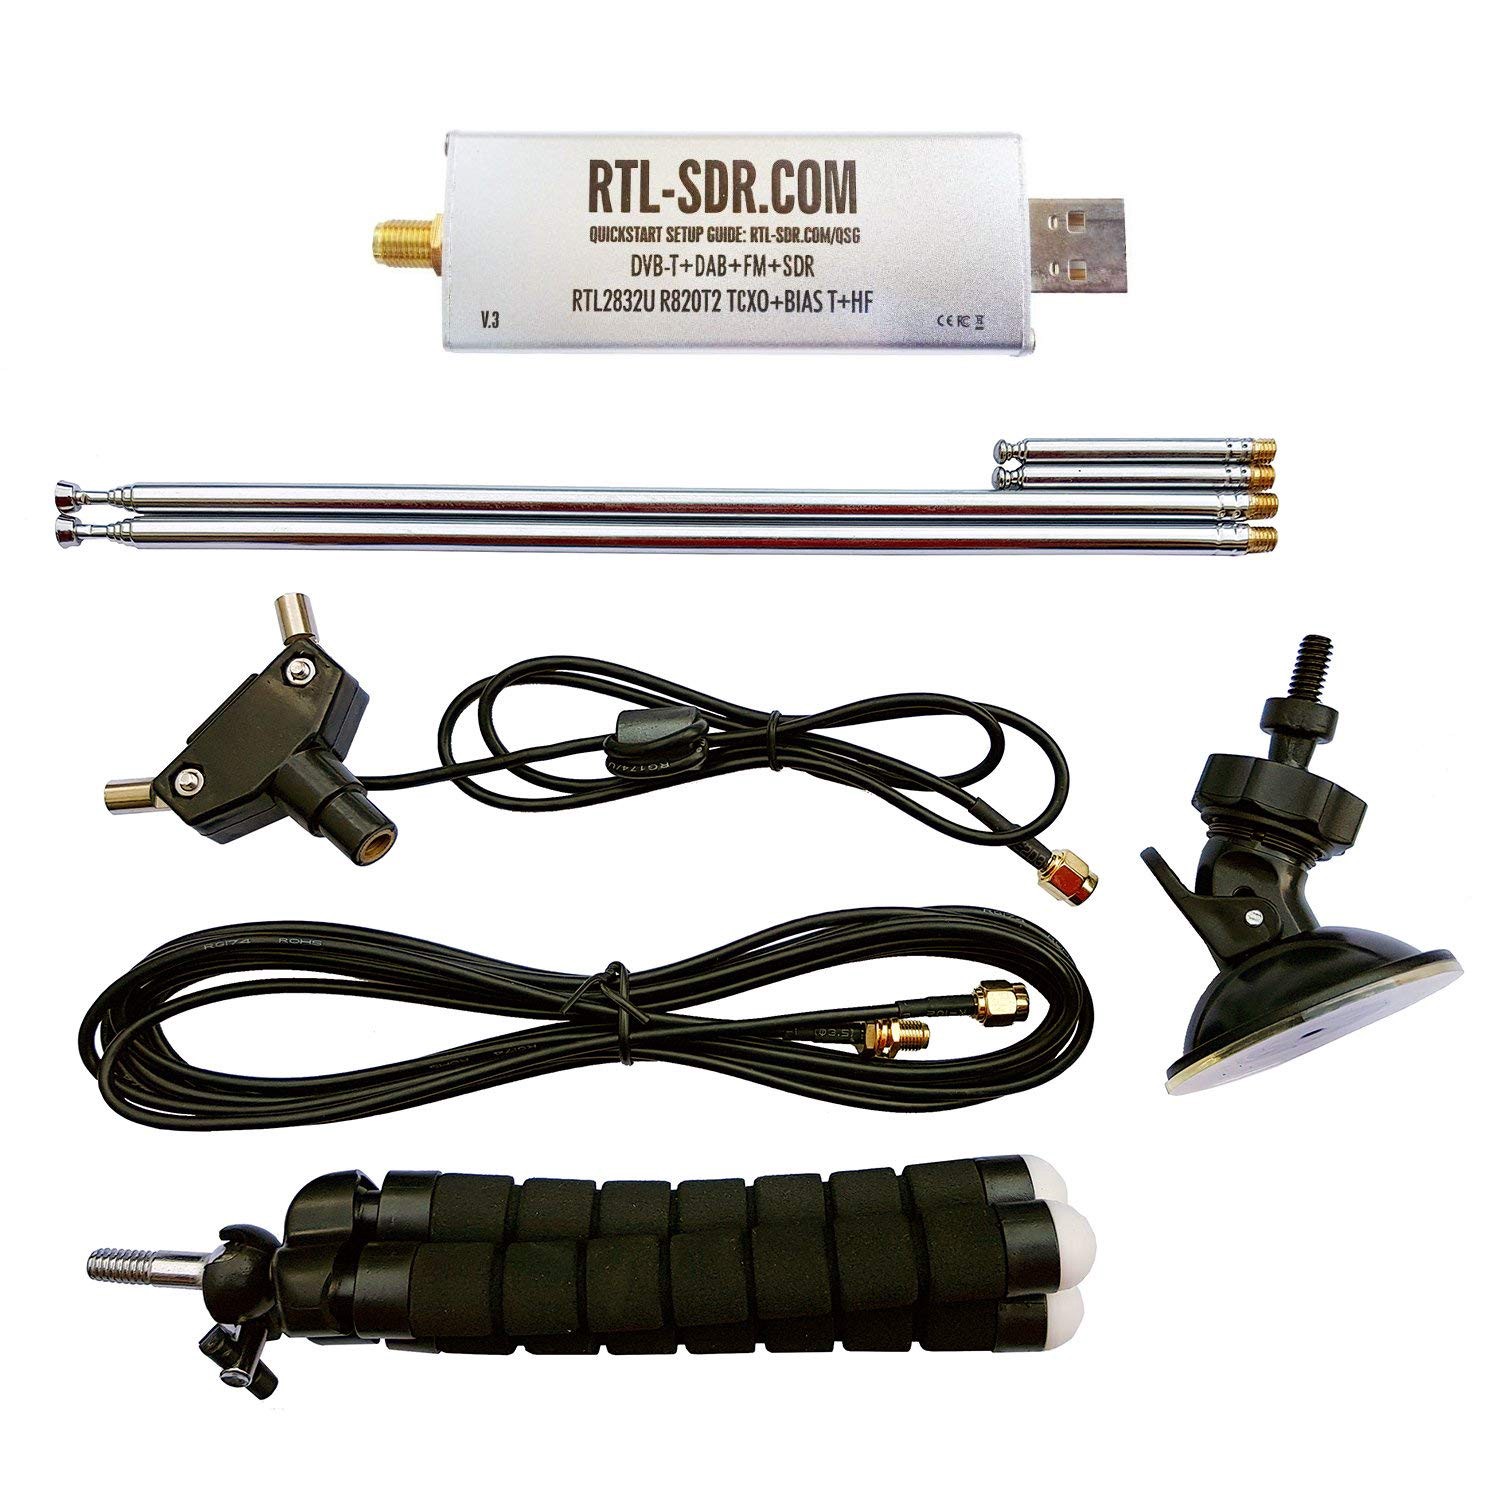
The kit contains a very common device branded RTL-SDR. Many programs support RTL-SDR devices, so you’ll find that software programs other than the ones I link work great.
I am writing many of the instructions below for computers running macOS, but I will also include information for Windows users. Basically any modern computer has the processing capability for this task.
The Software
The basic workflow for capturing NOAA satellite data is as follows:
- Use a tuning program to configure the RTL-SDR hardware to receive audio at 137 MHz
- Pipe this audio into an APT decoding program
- Process the audio and post-process the image
The first thing to install is a piece of software that enables you to pipe audio between programs. Soundflower on macOS works well for this, as does VB-Audio on Windows. Install one or the other depending on your platform. If all goes well the new virtual audio device should appear in a list of input and output audio devices on your computer.
CubicSDR, for both macOS and Windows, is a wonderful program that makes using your RTl-SDR device very easy. Download it from here.
In order to verify that everything works you should first do some preliminary setup of the antenna. Screw the two longer telescoping antennas into the v-mount included with the kit. Attach one end of the long cable included in the kit to the output of the v-mount, then screw the other end into the exposed connector on the RTL-SDR device. Expand the antennas, and you’re good to go!
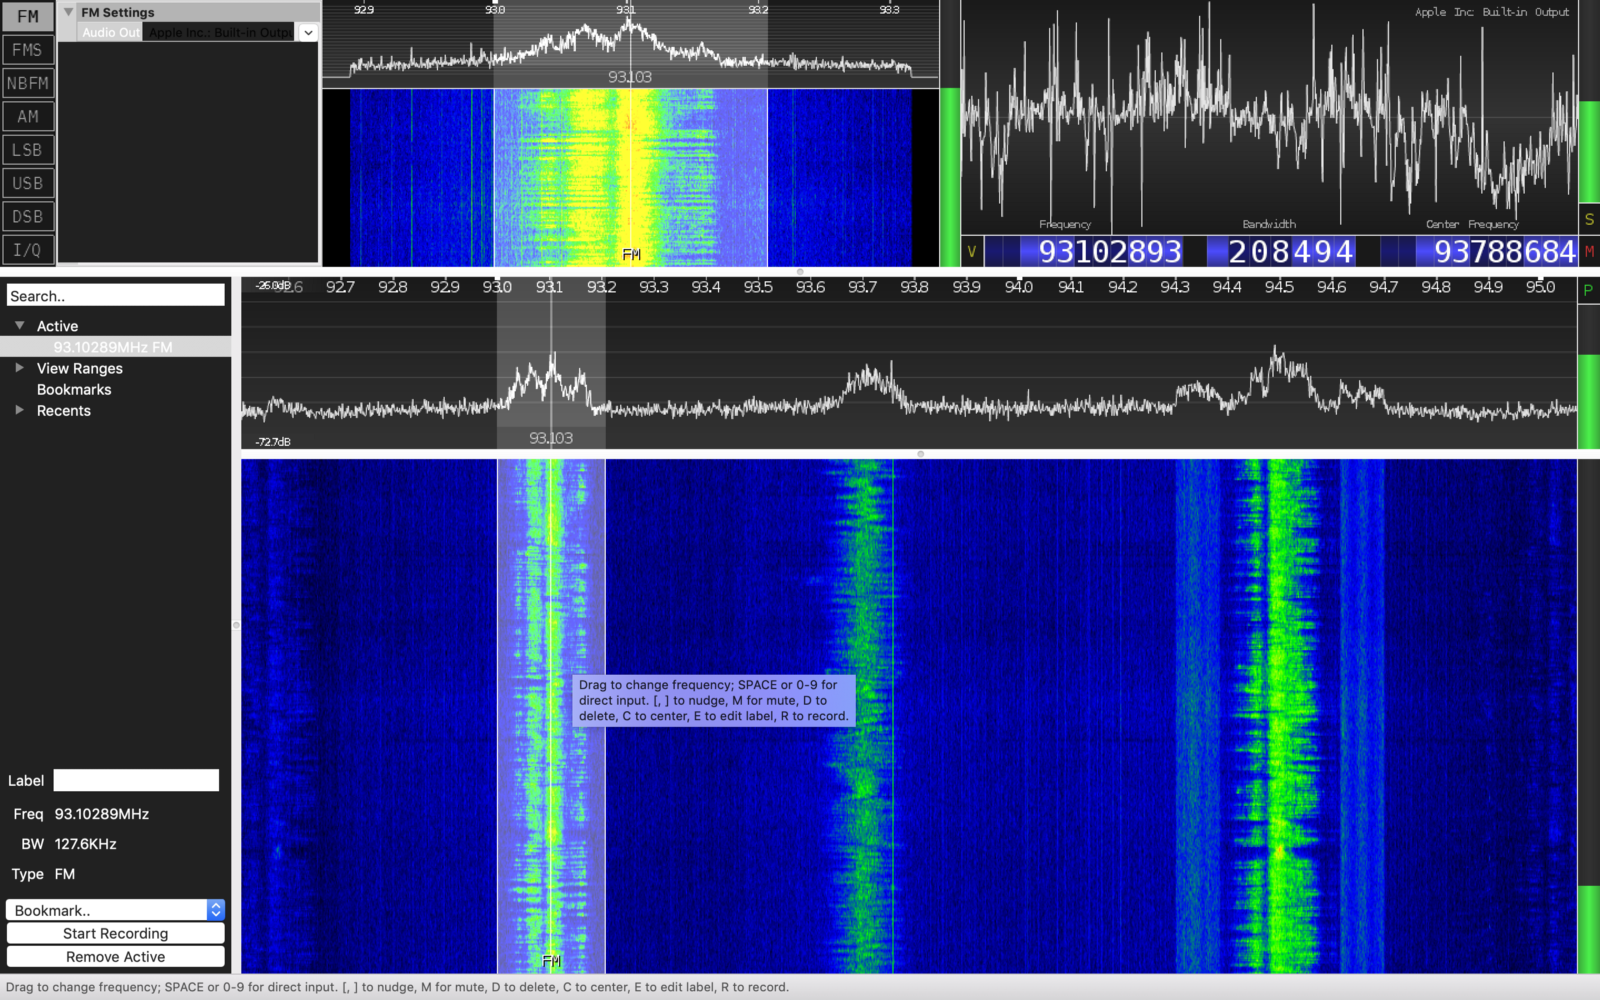
Plug the RTL-SDR into your computer, start CubicSDR, and the software should present you with a screen such as the one below:

Highlight the device called “Generic RTL….” and click start. You will then be presented with a waterfall view of the electromagnetic spectrum around you. Blue is the lowest signal level, ranging all the way up to red. The program defaults to centering on 100 MHz. You’ll likely find an FM station transmitting inside the default window; click on the center of one of the green bands and the station should start playing through the speakers on your computer (see the above image if you’re confused).
Next you need to install the program responsible for decoding the APT signals. By far the most common and most feature-rich program to do so is called WXtoImg. Unfortunately the program is no longer being developed, but you can download the last release of it here.
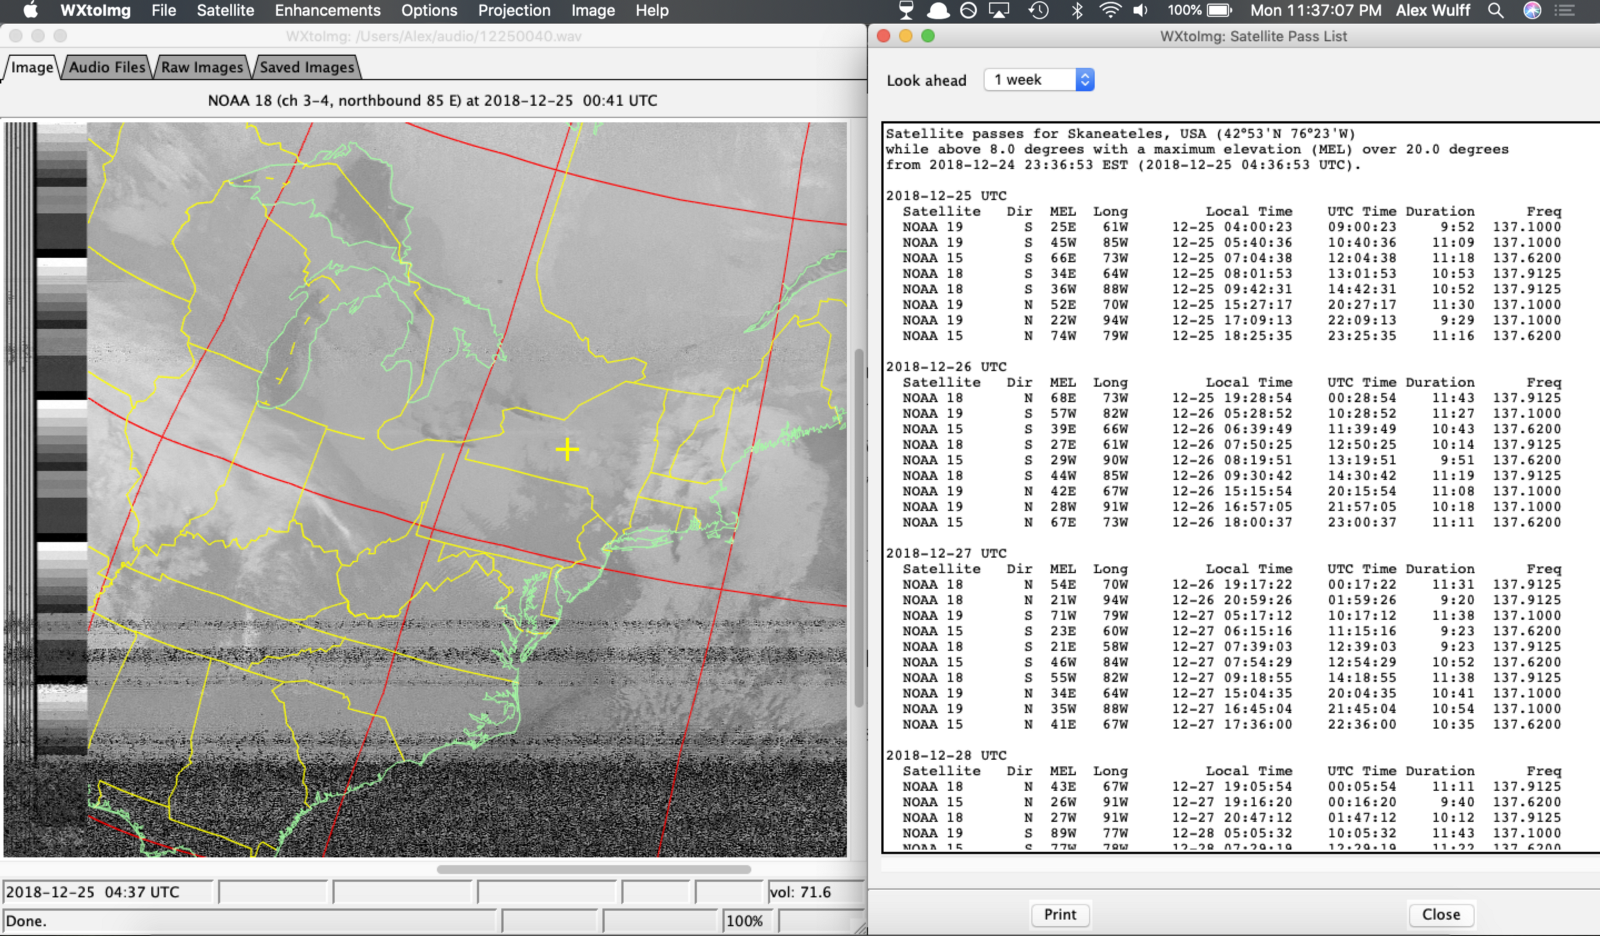
This is a great program that can both tell you when satellites will fly overhead and decode the audio coming into the program. Install it, and input your latitude and longitude information when prompted at setup. The first thing you’ll want to check out is the satellite flyover list. Click on File->Update Keplers, then select File->Satellite Pass List. A window similar to the one above should appear with the times of the satellite passes for the next week. Check under “Local Time” to see when the next one will occur!
An important thing to note here is the duration and altitude listed. With the antenna we’re going to use later on you want the satellite to be as close to directly overhead as possible. This will result in the least amount of noise in your image. For your first go it’s best to pick a pass where the satellite will be in the sky for at least 11:30 — there’s a positive relationship between this duration and the maximum angle that the satellite makes with the horizon as it passes. The longer the duration, the higher the maximum angle, the better your image. Below is an image I received on a pass with a 9-minute duration, which was clearly too low in the sky to be useful given my setup. Note that the map overlay is added in post.

If you see something like this at first don’t be discouraged! Those vertical bars in the middle and sides indicate that you are receiving transmissions from a satellite.
Now that you have your satellite pass information you can start working on your setup. The first thing you should try is linking all these programs together — I’ll explain how this works. Cubic SDR will take the raw information coming in from your RTL-SDR device, perform whatever demodulation you tell it to (in this case FM), and output it to whatever audio output you give it. WXToImg then takes this audio stream and converts it in real-time to an image.
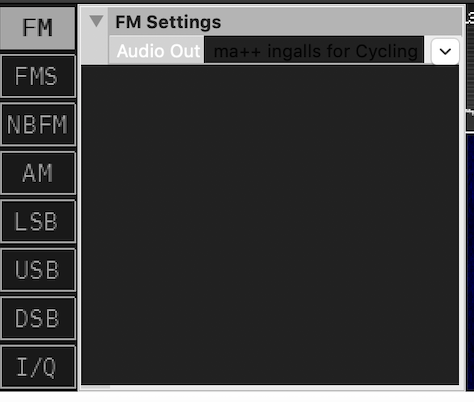
First-off, start Cubic SDR with your RTL-SDR device attached. Pick any FM radio station, and make sure the audio coming out of your speakers sounds at least somewhat nice. You can change frequencies by either clicking on the waterfall plot, or changing things numerically in the window at the top-right. Now, click the audio-out dropdown in the top left corner and choose your virtual audio device that you previously setup. In my case, this was “Soundflower (2ch).”
You can then leave this in the background. Start WXToImg, and navigate to Options->Recording Options. Under “Common Recording Options” click on the “ soundcard” dropdown and select the same virtual audio device. Click Ok to confirm, then select File->Record.
When it comes time for the real satellite flyover you’ll be hitting Auto Record. This will start the recording and decoding process when the satellite first appears on the horizon and stop it when the satellite disappears (it figures this out the same way it figures out when the flyover will occur — it has nothing to do with the signal you’re feeding it). For now, try hitting Manual Test. Line by line, you should now see a bunch of static filling the screen. This is WXToImg attempting to convert the audio of the radio station to a weather satellite image. Naturally, this is just garbage!

If lines of black pixels fill the screen, you likely have your audio pipe configured incorrectly. The static indicates that there’s audio there for it to try and decode.
Now it’s time to set up your antenna! Extend your antennas so that they are exactly 53cm, and spread them 120 degrees apart. Place this outside on the ground such that the antennas are parallel with the ground, and point the center of the V northward.
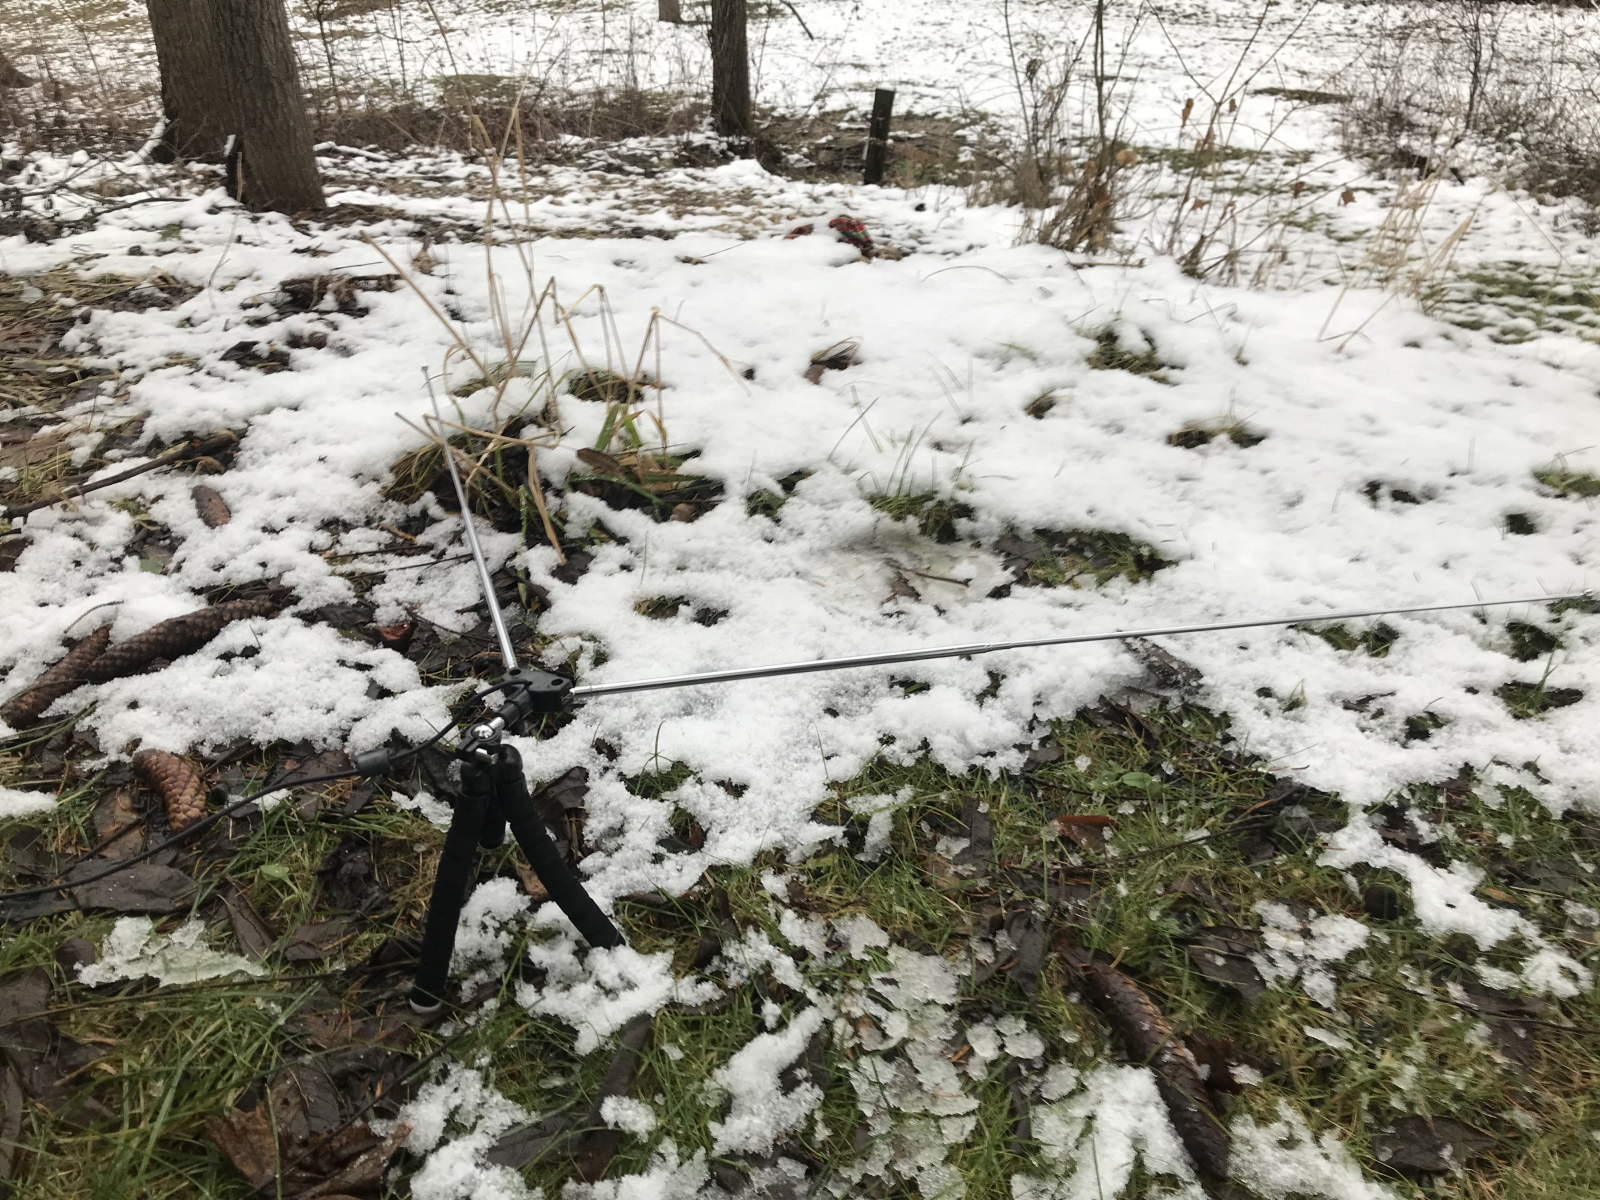
You can get significantly improved pictures if you mount the antenna on something above the ground. I duct-taped mine to a 2x4 that raised it about 6 feet off the ground:

Check the pass list for the frequency of the next passing satellite, tune Cubic SDR to that frequency, and set the bandwidth to 40 kHz. Open WXToImg, select File->Record and then select Auto Record. You’re now ready to receive! When the satellite rises on the horizon you will steadily see the following signal emerge from the noise in Cubic SDR:

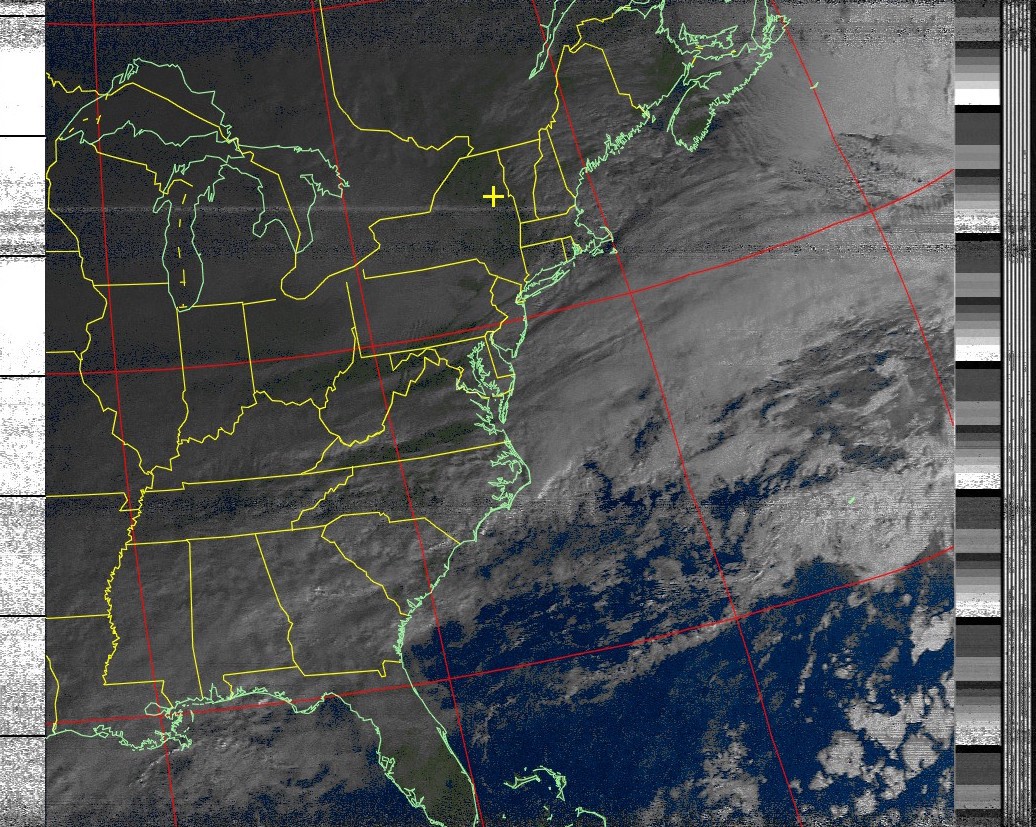
It really is quite amazing to watch for the first time. Check back in WXToImg to watch the image appear in real time. After recording is complete, the images should initially look like the picture below:

Inside of WXToImg you can add things such as map overlays and clean up the image. You can also play around with it to create false-color images, temperature maps, and more.
That’s all! If you have any questions post them below, and if you enjoyed this article you can view my website.
